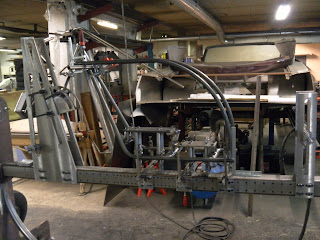
 Then the last tube. I dont use a pipebender I only use an accetylen oxygen torch for bending the pipes for this work. After this start welding. Remeber when fiting the tubes on the frame dont use any force to keep then in place or you will fu*k up the frame when you take it out of the frame jig.
Monday, January 31, 2011
Frame
 Then the last tube. I dont use a pipebender I only use an accetylen oxygen torch for bending the pipes for this work. After this start welding. Remeber when fiting the tubes on the frame dont use any force to keep then in place or you will fu*k up the frame when you take it out of the frame jig.
Frame work
Tank
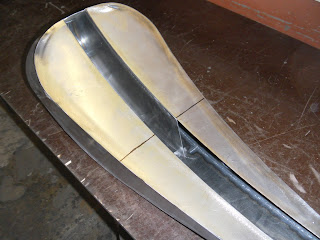
 The tank upside down. I fabed the plate between the oil and gastank, behind it will be space for the electrical stuff. I will show how I made the tank so follow closely, more to come.
 Close view of the inside plate, here is still a lot of work to come.
 The inside of the tank. I dont have any metalforming machinery at my shop I just use pipes, my knee or what i find to shape the metall. Here you can see how the tank is made, I used the front of an new taiwan ted sportster tank the cheapest I could find at the local dealer. The round sides are made of bent tube and the straight sides and top are made of 1,5mm sheet metall.
 Frankies Bike
Wednesday, January 26, 2011
Friday, January 21, 2011
FBF Frame
Thursday, January 20, 2011
FBF Frame
Monday, January 17, 2011
American sport bike XLH -71
FBF Frame
Friday, January 14, 2011
FBF Frame
Possu the bike
 Ok, have been making some progress with this bike got the engine in and the tranny in place,
I need to make new pipes for the bike because the set I made earlier do not fit this engine setup...............sh*t
 I am also building a open chain drive primary out of old parts I have laying in the shop. I also have to fix the oilbag because the chain will hit it.......sh*t again
 Making some parts for the transmission to keep it in place, modifying the support to be locked in the frame so the transmission is not going to move under hard acceleration.
Subscribe to:
Posts (Atom)


